5 tips for painting a mural on a textured surface
For a seasoned muralist like me, or a beginner wanting to create a piece of bespoke artwork for their home, the surface or a mural is probably the thing that is most often overlooked that will have the BIGGEST impact on the overall painting experience and execution of the design.
Let’s just say it now….pebbledash is a pain! Here are 5 tips for painting on textured surfaces like brick, pebbledash, slatted wood etc.
1. keep it simple
My number one tip (and I learned this through experience..) is to keep your design simple and organic. When I say simple, I mean that details are no smaller than your palm. Tiny details like thin lettering etc will be a nightmare to paint. I’d also recommend keeping your paint palette simple to 5 colours max. Anything you can do to reduce the amount of time switching paint colours and detailing outlines.
2. use the right tools
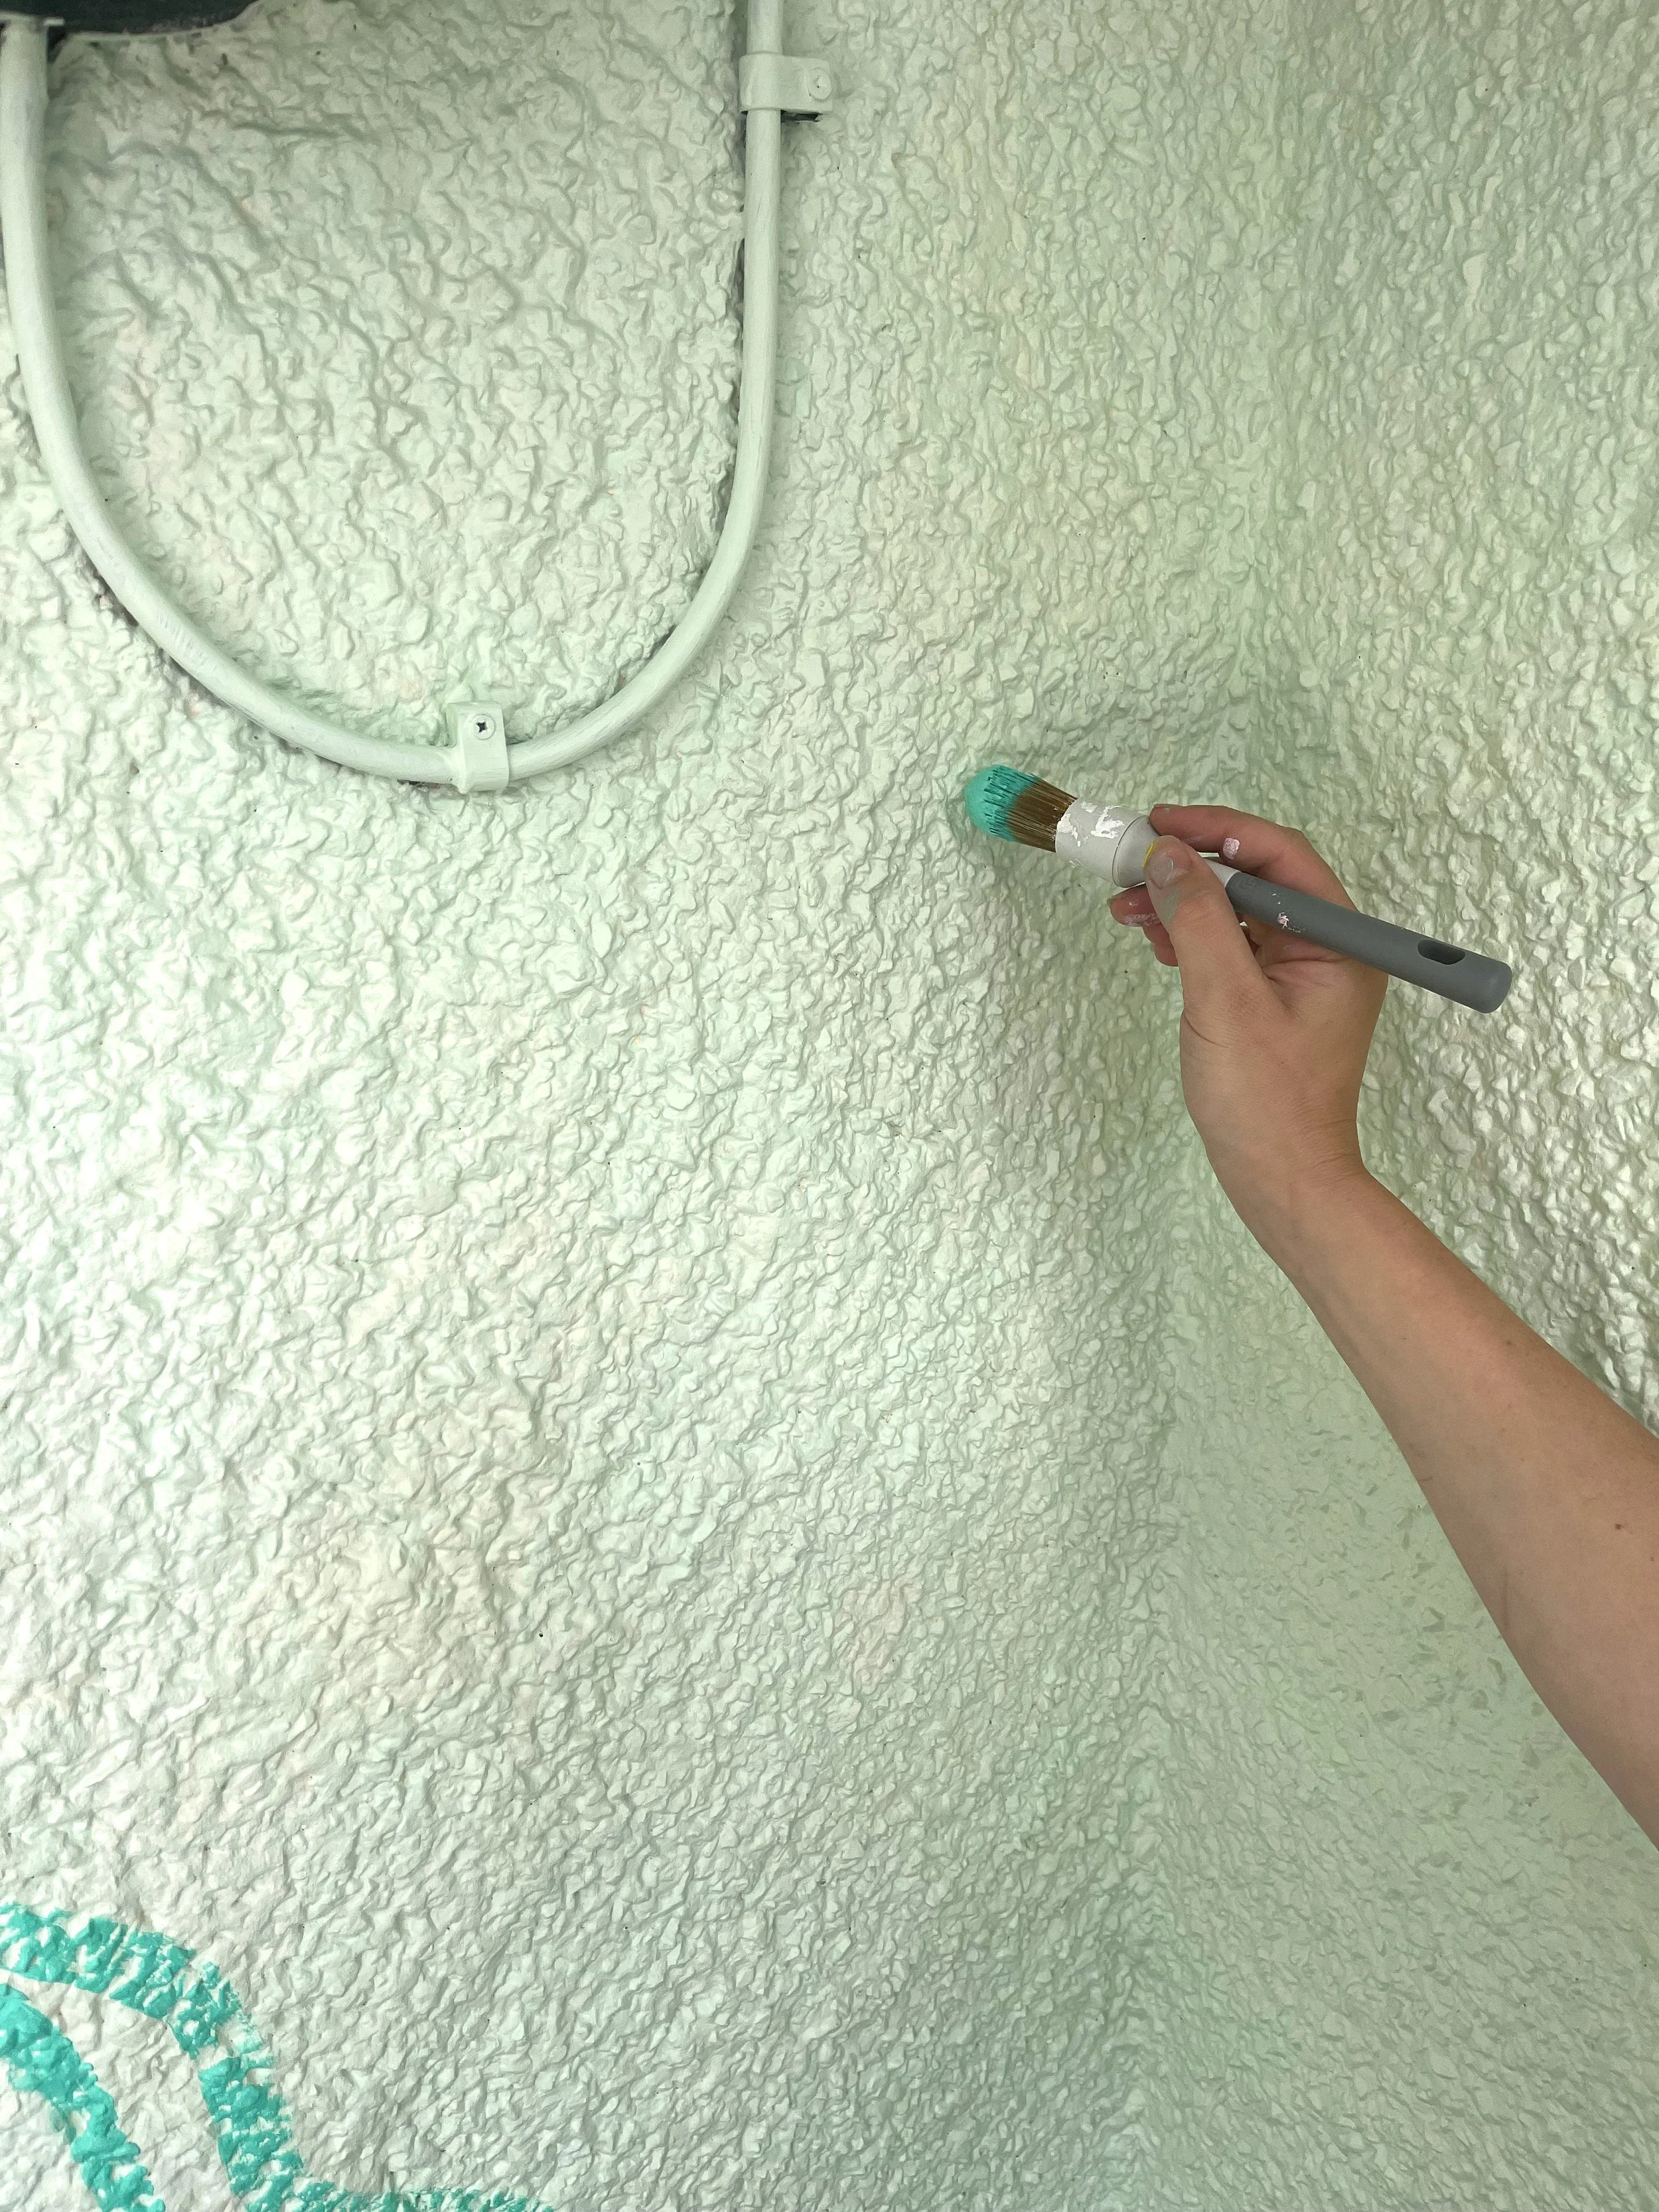
I prefer a round tip brush for textured surfaces. The brush hairs are tapered which allows the brush to smoothly glide across an uneven surface. You can twist the brush in your hand to keep the paint flowing. I’ve also heard great things about brushes from ‘ZIBRA’. You can use a fluffy roller to get in between the gaps however I find that rollers absorb so much paint that I’d rather use a brush. They can be quicker but I find they apply a thinner layer of paint so can require more coats in the long run.
Using a brush? Play with the way the brush moves over the texture, I’ve found that brushes can create lovely textures by gently dragging them over an uneven surface which could add that extra dimension to your mural and it allows you to work with the surface rather than against it :)

3. don’t worry about the detail
I promise you, I’ve been there…obsessing over a tiny frayed paint edge where my lovely brush stroke becomes broken just for a teeny few mm’s. I’ve spent the time neatening those edges so they are PERFECT!
I’ve also looked at other people’s murals and never stepped closer than a metre away to admire the paint job. If you do however get close enough to look at the paint strokes of someone less obsessive, perfectionist than you, you’ll spot these frayed imperfect edges all over the place. They aren’t worse painters, they just have a better judgement of what is good enough. Don;t get me wrong, I love being a perfectionist, getting crisp edges and fine lines and most of my work is immaculate, but as a muralist, it’s important to be able to look objectively at your work and know when to step away. I’ve begun to realise that some of these micro imperfections are impossible to see, I’m only noticing them because I’ve become intimately acquainted with a wall for the best part of a week.
So take it from me, you can save yourself some time, and neuroticism, by stepping back and objectively deciding that it is good enough. This is vital when working on textured surfaces. If anything, take as many textured jobs as you can as it is impossible to be prefect when you’re dragging a brush over a bumpy surface. Working with pebbledash and brick has taught me to take the perfectionist hat off and realise my work is still good, even with the odd tickly brush line. It also makes smooth walls a total dream…like cycling from gravel to tarmac…dreamy!
If you can hardly see it, the public definitely won’t
You can maintain high standards without obsessing over tiny imperfections
The work you are doing is massively improving the space
If you’re really struggling, work with a textured surface which will force you to consider what is ‘good enough’
4. consider 1 coat of paint
Pebble dash surfaces drink paint. Especially if you’re applying by brush. The paint will pool in the lumps and wells created by the pebbly surface. This can actually save you time. With a thicker coating of paint you may only need to apply one coat. Be careful though in cold weather that this thicker coat is drying properly. If in doubt, try a test patch first. Overall the painting process may feel very laborious but you may end up taking the same amount of time as a flat wall by using one coat of paint.
5. anti-vandal coatings?
If you’re working on a mural on a heavily textured surface, anti-vandal coatings are most likely a waste of time and money, not to mention they are nasty things to apply. An anti vandal coating allows a wall to be scrubbed clean if they are tagged with grafitti. Unless the anti-vandal coating creates a nice, flat smooth top coat, it’ll be impossible to scrub clean a textured wall. Think about how spray paint will get in between the bumps, especially true for pebbledash. It would probably be cheaper to re-paint affected areas.
I always paint block colours that are pre-mixed which allows anyone (yes really) to fix a paint job. Think of it as a paint by numbers. Hopefully this won’t be something you’d need to do, but you can absolutely save yourself some time by avoiding the laborious top coat of anti-vandal paint on a bumpy surface.